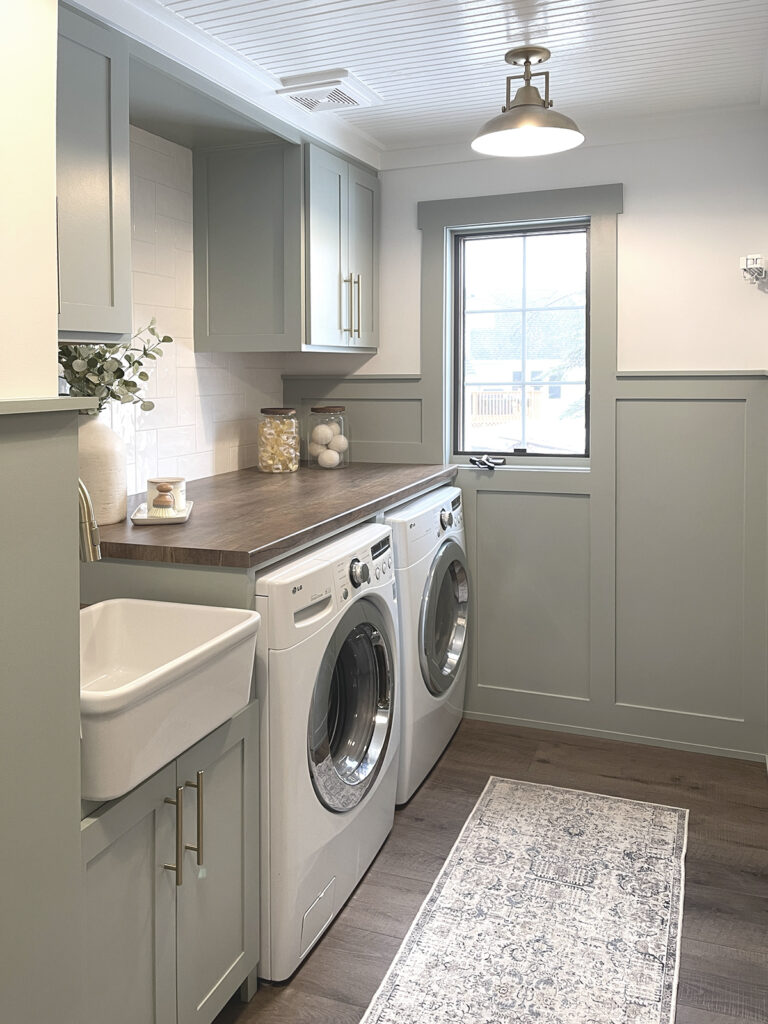
Laundry Room
Where do I even begin with this room? First let me tell you that this renovation was not really scheduled to take place when it did or how it did. As Jim was replacing the floors, we had already decided that we wanted the same floor throughout the entire main level because it just made sense and we really wanted to strive for cohesiveness.

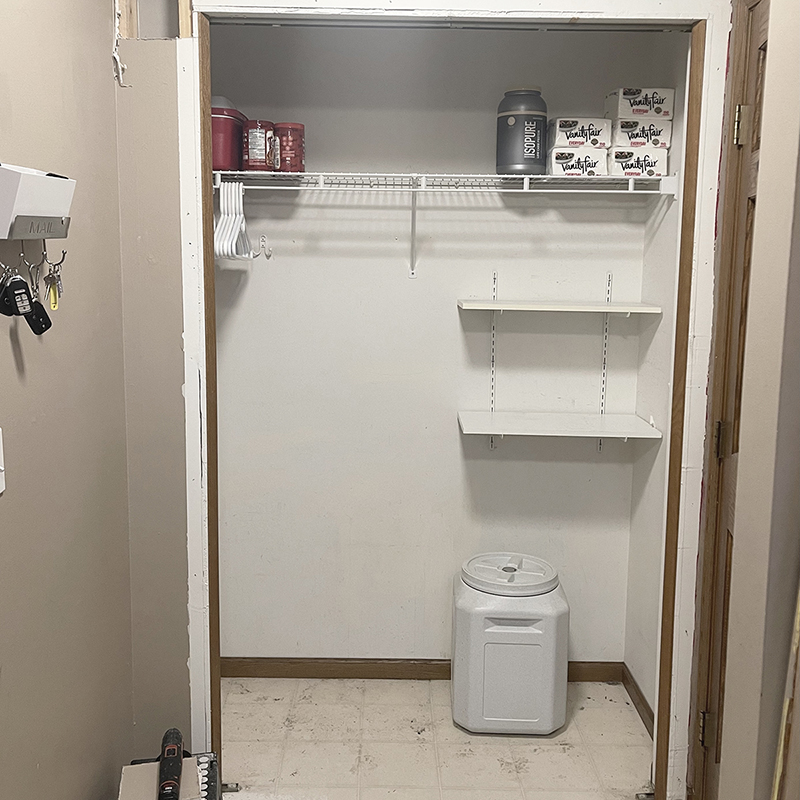
Assessing the Project
When we reached the laundry room we had two choices we could either lay down the LVP floors around the existing closet that was there or we could remove the closet in it’s entirety and lay down the floors the correct way. We ended up going for the later option knowing that it would be the right one. The opening of the closet was completely removed and the walls had to be renovated due to the damage and also to achieve smooth walls.
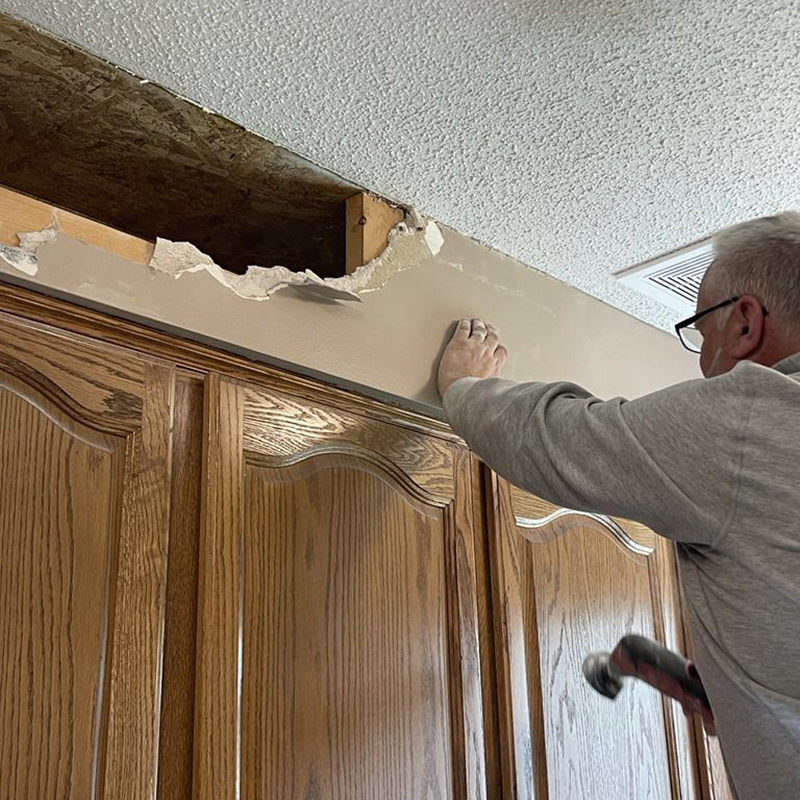
Removed Soffit and Cabinets
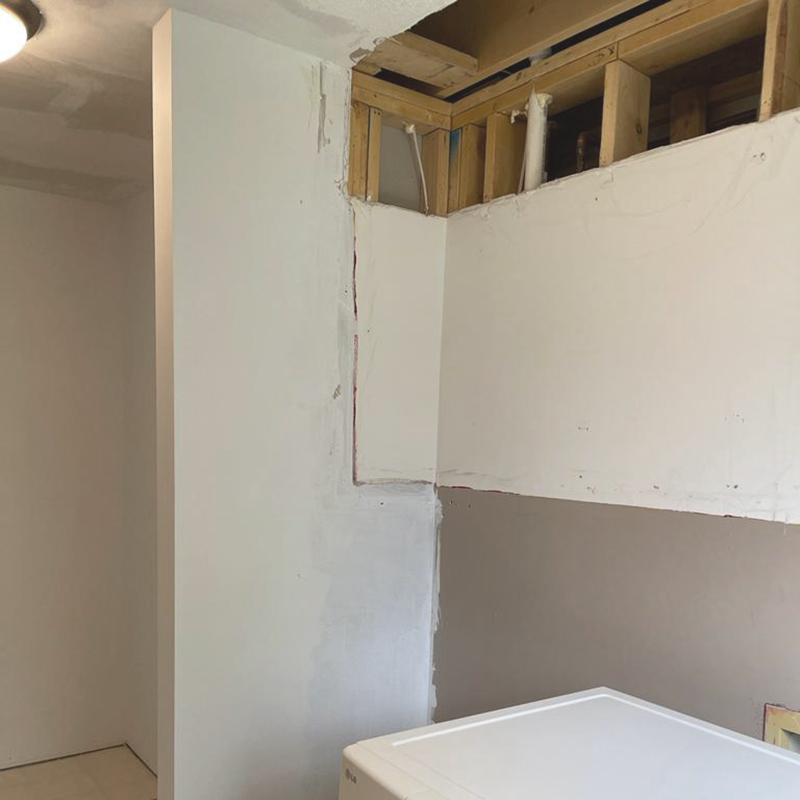
When that was done, I looked over the washer and dryer and saw the dated soffit and the amount of wasted space it took so I asked Jim “how hard would it be to remove the cabinet and the soffit space?” I wish I would have video recorded his reaction because the look on his face was epic! He got up on the ladder and started cutting through to see if it was hollow and no plumbing was going to be in the way. We were thrilled to see that it was indeed hollow and we could remove the wasted space along with the cabinets.
Since I knew the amount of work that would be, I thought we would just place the old cabinets temporarily until we came back to the laundry room, but Jim surprised me when he said he build from scratch the upper and lower cabinets. We shared ideas of what we had in mind and after going back and forth, we finally agreed on color, layout and style. He designed it with exact measurements in his computer and the building process began.
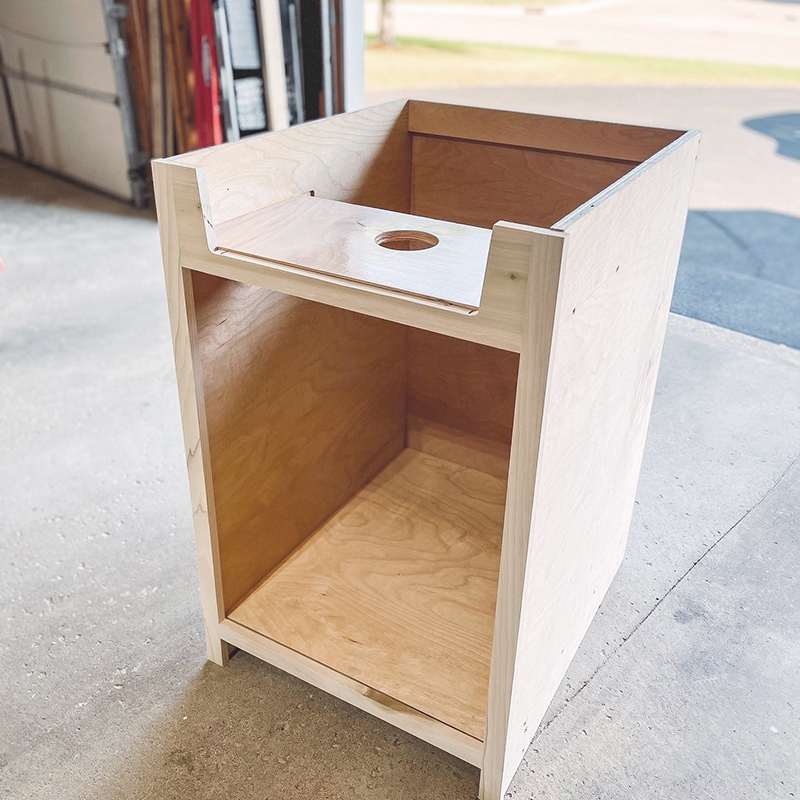
New Cabinets Build
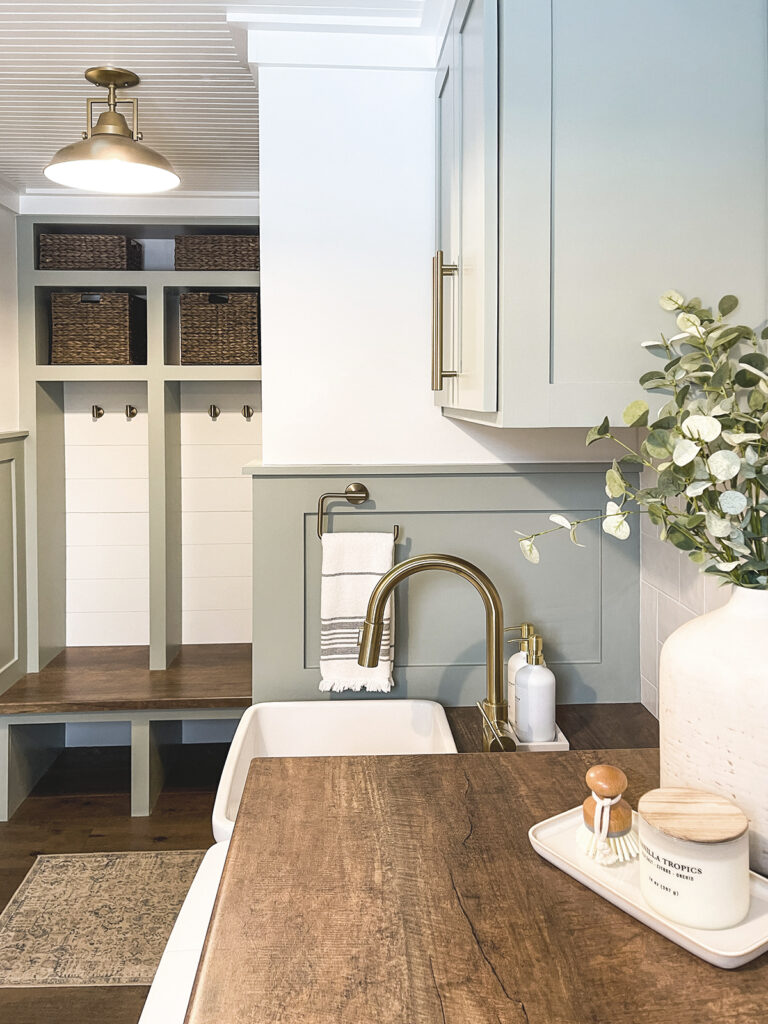
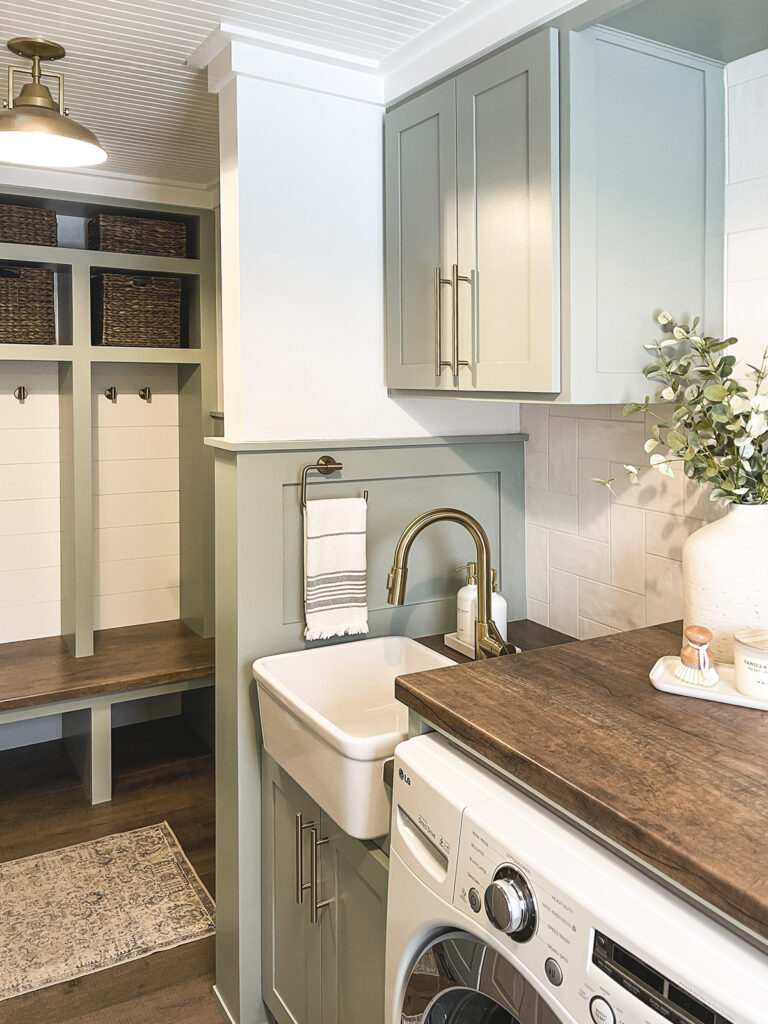
We started with the seating bench where the closet used to be. Since this had to be sturdy enough to hold a great deal of weight, the bench was built out of 3/4” sanded birch plywood. It was built as one piece and bolted to the floor. Then he built the back part along with the storage cubbies on the top, these were built into two separate sections. We are currently working on a PDF Instructions & Plan of this built-in in order to share with all of you.
Final Result
The cabinets were built of the same exact material as the built-in. We added the farmhouse touch to the lower cabinet with an over mounted sink. As for the walls we wanted subway tile but in a different layout to give a more elegant and unique twist to the entire look. We also removed the popcorn from the ceiling and added bead board and simple but modern crown molding to match our modern farmhouse craftsman style. To add a touch of color and elegance, we added the hardware of the cabinets, hooks in the storage area and faucet in satin champagne brass color. This entire renovation took 9 months, but I can honestly say that it has well over exceeded our expectations. We are beyond happy with the results and I now look forward to doing laundry which I never thought it would be possible!
You can find all the Laundry Room products, from construction to decor, click here.
